I have been wanting to do something different from our daily routine for dinner, and I’ve been craving spicy and shrimp. So what better than jambalaya!
I couldn’t find one perfect easy recipe, so I just took bits and pieces from several with a few additions of my own – the results are fantastic!
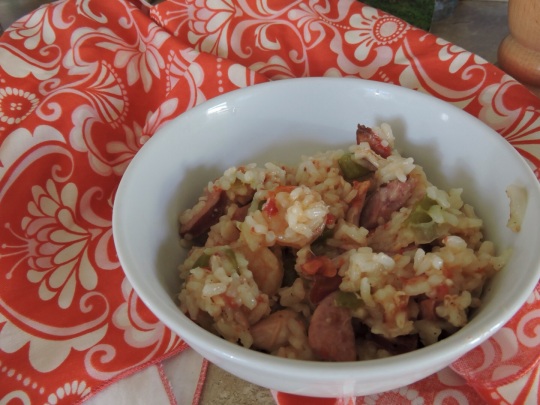
Behold:
Easy Jambalaya!
Or as my family calls it; Jambi.
Ingredients:
Olive oil
1-2 cups cooked chicken breast, chopped into bite sized pieces
8 oz kielbasa, cut into 1/4 inch slices, then halved
1 onion, diced
1 green bell pepper, diced
3 celery stalks, diced
2 tablespoons minced garlic
Cajun seasoning
Salt and pepper
2 cups uncooked white rice
2 14 oz cans chicken broth
1 can original Rotel
1/2 lb cooked shrimp, tails off
2 teaspoons Worcestershire sauce
1 teaspoon hot sauce
In this recipe you could absolutely use 1-2 uncooked, cut chicken breasts and just cook them first. I, however, had left overs from this week making Engagement Chicken from one of my favorite cookbooks!
Truly, give this one a go – both the book and the recipe. Easy, DELICIOUS chicken proven time and time again to impress your guests – or your significant other, or yourself… Whoever.
If you choose to use raw chicken, cook it before the kielbasa. If cooked, follow the directions as follows:
Heat oil in a large pot over medium heat. Sauté kielbasa until it begins to brown.
Add chicken and sauté a few minutes more until meat is browned.
Add peppers and onions, sauté 2 minutes until they begin to soften.
Add celery and garlic, sauté a few minutes more until onions begin to become translucent.
Add and stir in seasonings to taste. I recommend at least 1-2 teaspoons of Cajun seasoning, but err on the side of caution since you can always add later.
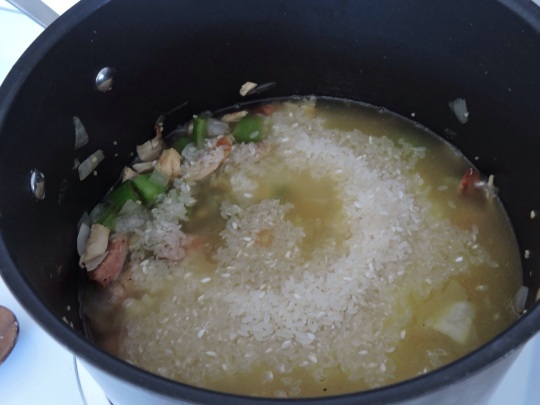
Add rice.
Add chicken broth.
Add my own little secret ingredient, the entire Rotel can, juices and all.
Stir together and bring to a boil.
Add shrimp to the top of the mixture.
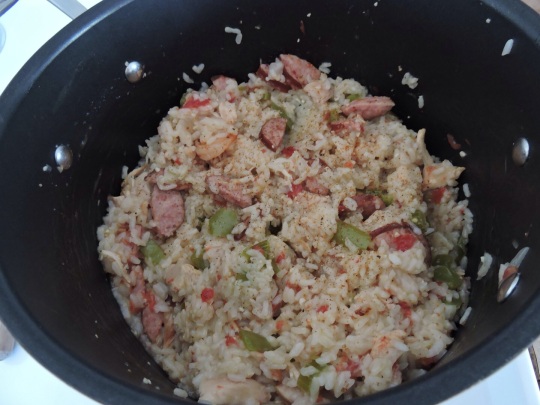
Reduce heat to medium low and cover. Cook 20-30 minutes, or until rice is tender.
Remove from heat and stir in Worcestershire and hot sauce. Leave the lid on to keep the moisture in, but now is the perfect time to taste and add more seasonings as needed.
Enjoy!
So my daughter and I had a lazy day today. So lazy that I looked at the clock in enough time to realize that I only had two hours before I had to leave for work to cook, clean, and shower.
I still decided to put some effort into dinner with what little we had in our cupboards and got creative. The results were fantastic.
Chicken & Broccoli with a Garlic Basil Cream Sauce
You will need:
Oil, for cooking
Chicken breasts, thawed (one per person)
Seasonings to taste (I used salt, pepper, and garlic salt)
1 cup broccoli, cut into bite sized pieces (mine were frozen)
1/2 cup onion, chopped
Box rice of your choice, I used Chicken and Garlic Rice-a-Roni
Garlic Basil Cream Sauce:
2 tbsp butter
1 tbsp minced garlic
1/2 tsp salt
2 tbsp flour
1 cup milk
5-6 leaves of fresh basil (chopped), or 1-2 tsp dried basil
Oil frying pan, season chicken breasts, and pan fry on medium heat. Brown both sides of chicken, reducing heat if needed to time dinner preperations.
In a separate pan, melt butter for sauce in low heat. Once melted add garlic. Stir occasionally, smearing garlic with the bottom of your spoon to reduce the garlic into the butter, about 3-5 minutes.
Add flour and salt. Stir/spread mixture frequently for approximately 3 minutes to minimize flour taste and texture.
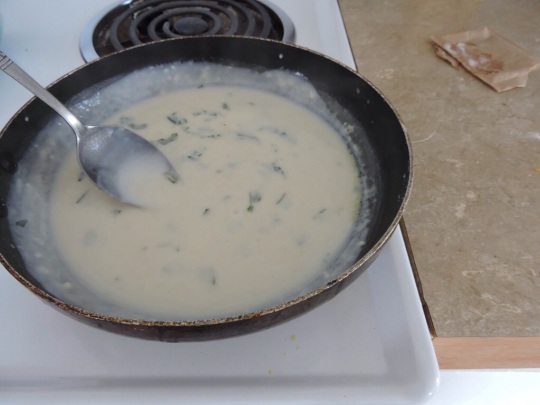
Slowly and simultaneously add milk and chopped basil until completely combined.
Raise heat to medium low and stir occasionally. Turn off heat when sauce has reached desired thickness.
In the meantime, after both sides of chicken are browned, add broccoli and onion to fry pan. Add extra seasonings if needed. Sauté with chicken until tender.
Plate with rice of choice, covering both rice and chicken/vegetable fry with cream sauce. So delicious!
Enjoy!
On a mild Friday, after cooking nothing but ho-hum dishes for a week, I decided I wanted to splurge. Something I’d been craving for a while was chowder. I wanted something easy, the usual seafood chowder recipes I see have a ridiculous amount of ingredients and requirements, but I didn’t want just plain clam chowder either. So I tweaked a recipe and came up with an easier version.
Semi Seafood Chowder
Simple. Delicious. Simply delicious.
This is all it takes:
The recipe I created is a variation of the one that can be found here. Specifically, my ingredients are:
3 (6.5 oz) minced clams
1/2 lb halibut, cut into bite sized pieces
1/4 lb bay scallops
1 onion
2 potatoes
1-2 celery stalks
3/4 cup butter
3/4 cup all-purpose flour
1 quart half-and-half
2 tbsp red wine vinegar
Salt and pepper to taste.
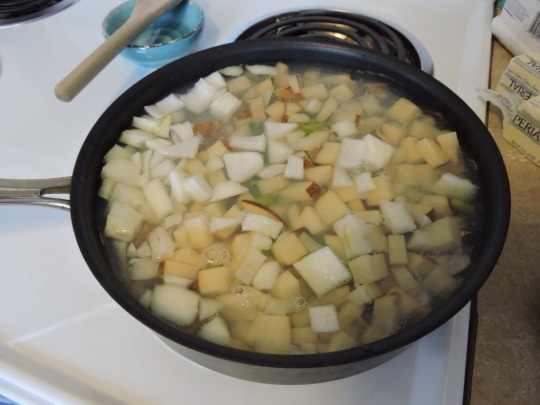
Wash and chop veggies. I chose to leave my potato skins on.
In a deep skillet, add veggies and juice from the clams.
Cover with water and cook on medium to medium high heat.
As veggies just begin to get tender, add the chunks of halibut. Continue to cook on medium to medium high heat until veggies and halibut are tender.
As the skillet portion cooks, melt butter over medium heat in a large heavy saucepan. Whisk in flour.
p
Add half-and-half slowly, whisking constantly until thick and smooth.
Add the contents of the skillet to the cream mixture. Reduce heat slightly to heat the chowder thoroughly without boiling. Add bay scallops.
Continue to heat over medium low heat for 20 minutes, until chowder is heated through and bay scallops are cooked but tender. In the last minute or so before serving, stir in clams, vinegar, salt and pepper.
I served this up with a nice asiago cheese loaf from our local grocery store. If my husband would have given me the chance to take a picture of his pretty bowl of chowder before starting to wolf it down, you would get a better picture of the finished product. Instead, you’ll have to settle with my to-go container at work. Have fun cooking y’all!
So I have about 5 posts in “draft” because I’m too lazy, don’t have enough detail, blablabla.. I have now created something that has pushed all of those things aside and made me want to post this asap!
As you can see from my enchilada rice post, I love enchiladas! Mexican food in general, but I could eat an enchilada combo meal of one chicken one cheese every day of my life and be happy. Fat, but happy.
Well I made enchilada rice this week, and of course the giant can of sauce was on sale. Since I only used about 4 tablespoons out of it, I had a lot left and didn’t want it to go to waste.
I decided to get creative – for this reason I really didn’t take any pictures. I didn’t know how it would turn out. I’m kicking myself.
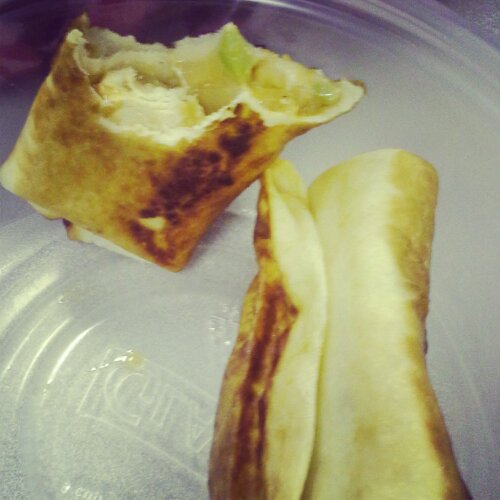
Thinking back to the Pin Test I did on the Taquitos that I basically turned into chimichangas, I decided to roll in the direction and came up with what I call:
Mmmmmm. There’s not a lot of detail in that picture and for that I’m sorry. But its simple and DELICIOUS.
Ingredients
1-2 chicken breasts (1.5 made about 5 medium chimis)
Seasonings of your choice
1/4 cup chopped green bell pepper (or more if desired)
1/4 cup chopped onion (or more if desired)
1/4 cup shredded cheese of your choice (I chose mozzarella, and again, add more if desired)
1/4 cup enchilada sauce (you know..)
Tortillas
Oil for frying
Paper towels for draining
Cut chicken into one inch pieces and season. I used salt, pepper, cajun seasoning and garlic powder. Cook on a medium heat thoroughly. Add chopped veggies to chicken when chicken is halfway through its cooking process. Add more seasoning for the added ingredients if desired. Stir occasionally until veggies are tender.
Heat oil in pan for frying.
Place chicken and veggies in a bowl and toss with enchilada sauce and half of the shredded cheese. Place 2-3 spoonfuls in the center of the tortilla and sprinkle some of the leftover cheese on top. Enough to fill the tortilla, but have it completely closed when folded.
To see crummy pictures on how to fold said tortillas, check out my second Pin Test that inspired this creation! I’ll explain it as best I can: fold each of the shorter ends over the mixture, crease the folds slightly, then fold one longer side over mixture, tuck, and roll.
After the chimi is rolled, place it in the frying pan seam side down. Fry until golden brown on each side, turning only once using two forks. When finished frying, drain on a plate lined with paper towels.
Y’all, again – I am so sorry for not taking pictures. This was an experiment that I wasn’t even sure would work, and then BOOM! It was too good not to post. So I reluctantly put it down to take at least one picture before I demolished it. I encourage everyone to give it a try!
I am always looking for a way to kick up our weekday dinners on the cheap. Either from low-cost ingredients or from things I would already have in my fridge.
This recipe does both!
Sure, spaghetti and tacos are always on our menu, but I am someone who can’t have the same thing, over and over, without eventually escaping to Jack in The Box.
So, anything that I can make, from sides to main dishes that can bring some life to our plates – I’m in.
This recipe is one I found on Pinterest a while ago. I’ve even made it as a meal in itself, but really it’s the perfect side for a lot of dishes.
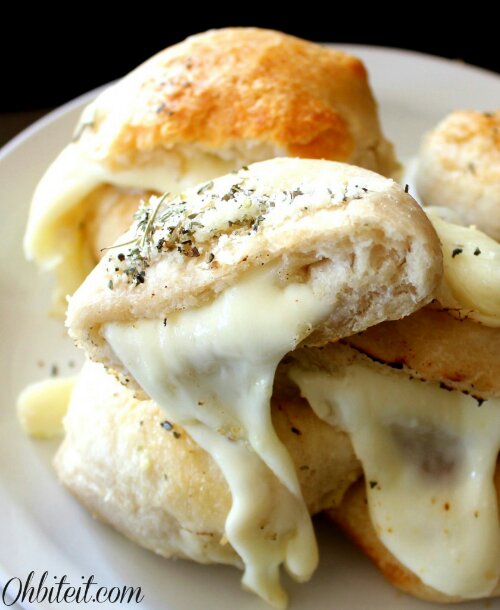
Biscuit Bombs!
This picture is taken directly from the website.
I don’t know where this girl got it from, but bravo. I would come to your house for dinner every night if it meant eating this way.
I had paired these with a stuffed salmon from Costco that my dad had bought for us, and it is also great with just about any pasta dish.
I did a variation of the recipe – here are the ingredients:
So easy it’s ridiculous.
Not to mention that you can customize it to be practically anything.
First, flatten a biscuit. Then load it with cheese and other deliciousness. In my case, mozzarella and fresh basil. Yum!
Fold the biscuit over the cheese so it is completely sealed, and put it in the pan with the seal down.
Repeat with all biscuits.
And really, load em up! Stuff them full. Worst case scenario they burst out the sides with gooey deliciousness. Bummer.
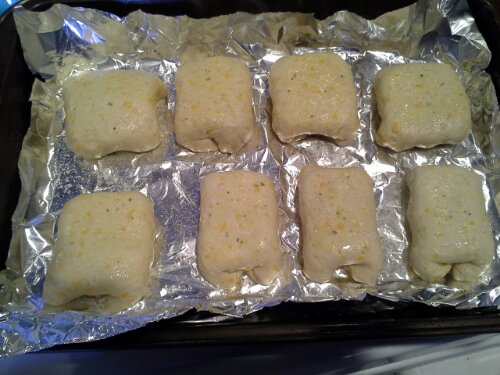
After all your biscuits are loaded, brush them with oil and season them to taste. Salt, pepper, parmesan as the original recipe showed.. Whatever your hearts desire.I chose a simple sprinkle of garlic salt.
Let me just apologize for the sheer awesomeness of these bad boys really quick.. They’re so amazing, they were gone before I remembered to take a final picture.
My bad.
But they came out just as beautifully golden and soft as the original picture, oozing and bursting at the seams with melted goodness.
I dare you to try them.
Follow my blog and my Pinterest boards to see what I do and other fun stuff!
This is a recipe I’ve perfected myself. After trial and error-ing several fried chicken recipes, I combined the best parts of them all and turned them into poppers!
I usually pair these with my homemade french fries, which can be found in this previous entry. These are one of my favorite things to make – hopefully you’ll enjoy them too!
So good!
Ingredients:
2-3 chicken breasts ~ 2 eggs ~ milk ~ your favorite hot sauce ~ 1-2 cups flour ~ salt and pepper ~ garlic salt ~ vegetable oil for frying
Cut the chicken breast into small, bite sized pieces.
Now, get two bowls. In one bowl, whisk the eggs with a splash of milk. Then, take your favorite type of hot sauce and whisk it in with the eggs to taste. I do about 3-4 dollops since mine is thicker, which comes out to maybe half of a teaspoon.
In the second bowl, mix the salt, pepper and garlic salt to the flour. You’ll do this to taste as well, but my suggestion is to make the ratios generous in the seasoning. After frying, it tends to lose some of its potency. I do about 2 teaspoons salt, 1 teaspoon pepper, and 1/2 teaspoon garlic salt.
Toss chicken in the egg until it’s well coated.
Dredge the egged chicken through the flour mixture to coat.
Fill a frying pan with vegetable oil until it covers the bottom of the pan. Heat over medium heat.
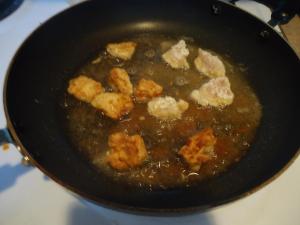
Drop coated chicken in frying pan.
Fry until the bottom of the chicken crisps to a light brown. Flip.
Continue to flip until evenly golden on each side.
Use a fork to take each done piece out. Place the popper on a plate with two paper towels to drain.
And you’re all set for deliciousness! They’re so good, and they go so fast!
Enjoy =)
One of my favorite recipes I’ve created on my own. It lasts for days between my husband and I, and it’s so hearty all you need is one small slice to feel incredibly satisfied.
I’m all about individual foods being your seasonings rather than loading up the recipe with a bunch of herbs and spices. Though there is always a time and a place for them, and I have a full spice rack on hand, I love mincing garlic and getting a zesty sausage, and crushing fresh basil leaves to give my recipe the flavor it needs.
So, that being said, take the liberty with this recipe to add whatever ingredients you want. Don’t like bacon? Scrap it. Don’t like garlic? Don’t add it, and throw in some herbs and spices you prefer. I created this recipe because it’s things I love nestled in eggs and a pie crust. I could not go wrong.
Ingredients
1 refrigerated pie crust ~ 1 pound country sausage ~ 3 strips of bacon ~ 1 small zucchini ~ 1/2 cup onion ~ 2 cloves garlic ~ 4 eggs ~ one cup milk ~ salt and pepper ~ 1/4 cup shredded cheese blend
Oh the deliciousness. Preheat your oven to 375. Place pie crust on counter to soften from being refrigerated.
Here’s a tip that I do – I buy a package of bacon, then freeze it in tinfoil in individual strips. Then, I pull off whatever I need and bake it in the oven. Even if your bacon is not frozen, oven baking the bacon frees up stove space and it can be done while your oven is preheating. Just watch it to make sure it doesn’t crisp too quickly, but it usually takes about 5-10 minutes while the oven is warming up.
If you choose to cook your bacon in the oven, place it on tin foil in the oven now.
Brown sausage in a fry pan on medium heat.
Chop, dice, and mince your zucchini, onion and garlic.
After the meat is browned and drained, add veggies to the pan. No need to sautee completely, this is just to heat them up and prepare them for baking.
Check your bacon.
By now, the pie crust should be thawed enough to unroll. If it hasn’t, I place mine in the middle of the stove top to use the heat from the oven to assist. Unroll the pie crust into a 9 inch pie plate.
Your bacon should be done by now, if not sooner. After draining the bacon on some paper towels, hand shred the bacon into small strips. Refrain from eating. Then spread a small layer on the bottom of the pie crust.
Next, evenly layer the sausage and veggie slurry over the bacon.
Sweet Moses I love this recipe.
Ok! Now in a bowl, whisk the eggs and milk with a fork. after combined, salt and pepper the eggs. This is mainly to taste, keeping in mind that the sausage will already be salty and zesty, so my rule of thumb is enough that when I stir it together I can still clearly see spots of pepper. Around 1/2-1 teaspoon of each.
Pour the egg mixture evenly in the pie crust. This is a hearty Quiche, so the meats and things will be sticking up over the egg. No need to fill to cover.
Sprinkle the shredded cheese over the top of the Quiche.
Bake in a preheated oven for 30-45 minutes. Bake until a knife inserted in the center comes out clean and edges of pie crust have browned.
Voila! Enjoy!
Hello again!
As a mom on the go, I enjoy a good crock pot meal. The less I have to do for dinner on a busy day, the better – especially if I can get it all done in the morning!
This crock pot meal is a tasty treat best served on rice and, oddly enough, though it’s “bourbon chicken”, the original recipe I found here did not call for bourbon! I thought that was the strangest thing. So the bourbon in this recipe is optional, however I recommend it.
Cooking for two: Ingredients
2 chicken breasts ~ salt and pepper ~ 1/2 cup honey ~ 1/4 cup soy sauce ~3 tablespoons ketchup ~ 1 tablespoon vegetable oil ~ 2 smaller cloves of garlic (minced) ~ 1/2 cup onion (diced) ~ red pepper flakes ~ 1 tablespoons bourbon or whiskey ~ 2 teaspoons flour ~ 6 teaspoons water ~ sesame seeds for garnish
Start by placing chicken breasts in your crockpot. Salt and pepper both sides of each breast.
Dice your onion and mince your garlic.
In a medium bowl combine honey, soy sauce, ketchup, oil, garlic and onion. Sprinkle the red pepper flakes on top of the mixture.
Here’s the optional. Though I would’ve loved to give it a really nice bourbon, all I had was Gentleman’s Jack. Lovely wedding present, but it made me nervous to cook with. Turned out GREAT though! I used the cap to measure, it came out around 1 tablespoons worth. combine to mixture.
Pour mixture evenly over chicken breasts in crockpot. Cook on high for 4 hours or low for 8 hours. My crockpot tends to cook much faster than needed, so halfway through I turned it down and, eventually, just put it on warm.
Approximately 10 minutes before serving, shred the chicken. To thicken and blend the sauce in the crock pot, add the flour and water. Serve over rice and garnish with sesame seeds. A wonderful weeknight dinner!
Here it is! Post #1. One of my favorite things to make is home-made french fries. They are so much healthier than any deep-fried option from a drive-thru, and taste infinitely better (and, again, better for you) than any frozen packaged option. Just a little more time and work, but trust me, it’s worth it!
This is a lunch that I made for my grandmother, my daughter and myself. The skewers are a recipe from one of the many cookbooks on my shelf, and the french fries are a recipe I’ve come up with through trial and error. Enjoy!
Ingredients
Skewers: 1-2 chicken breasts ~ 1 tablespoon peanut butter ~ 1 cup ginger garlic marinade ~ 1 tablespoon lemon juice ~ skewers for cooking
French Fries: Your favorite type of potato (I used a mixture of Yukon Gold and sweet potatoes) ~ 1-2 tablespoons olive oil ~ salt and pepper to taste ~ parchment paper for cooking
Ok! Time to marinade that chicken. It’s a little easier to cut the chicken into the strips you need if they are slightly frozen. If you’re working with frozen chicken breasts, do not defrost them all the way. If you’re working with other chicken breasts, put them in the freezer for 30 minutes or so to harden them up some.
In a bowl or baking dish, mix the peanut butter, marinade and lemon juice. I chose a honey peanut butter and a ginger pineapple marinade that included garlic. The amount of marinade you use is entirely up to you, but I found one cup to work the best for me. Mix well.
Slice the chicken into strips length wise. The longer the strip, the easier it will be to thread on the skewer. Toss in the marinade and place in the refrigerator to marinade at least one hour, but up to 24.
About 30 minutes before you are ready to cook the chicken, preheat your oven to 400 and soak your skewers in water to avoid them burning during cooking as much as possible.

Why is there never a container big enough and available when I need it? This works too, just make sure you flip them halfway through to soak both sides.
Now we start the fries! Wash your potatoes and get your cutting board ready!
Depending on your preference, you can leave the skins on the potatoes or peel them off. I personally peel off the ugly spots and leave the rest. If using sweet potatoes its easier to start by cutting off the ends. Then I slice them straight down the middle for easier cutting.
Now is the time to learn from my mistakes. I tell you this – parchment paper is a must. Unless you want to spend your time peeling the burning fries off your wax paper or the pan itself, only to have to put the pan back in to finish cooking the rest? By all means! But if you want a seamless, delicious experience – parchment paper is worth it.
Spread the cut potatoes over the parchment paper and drizzle with olive oil. Sprinkle in salt and pepper to taste, then toss for an even coat. Spread them back out, evenly, over the parchment paper. The less they touch, the less they stick together.
Put them in the preheated oven for 10 minutes.
Free time!
Are you excited yet?
You can start to smell them. Sooo good…
Ding! Take the fries out of the oven, but you’re not done. Flip them for even cooking and put them back in for a torturous 10-12 minutes. If you want to salt and pepper them anymore, now is the time to do it. For the crispiest of fries you may even want to keep them in 15, but 12 should get them a great, golden texture.
While you wait, again, take the marinated chicken out of the fridge. Thread 2-3 chicken strips onto each soaked skewer, then place it onto a baking sheet. After all chicken is threaded, pour remaining marinade over skewers.
Oh hey, your fries should be done! What perfect timing!
Take the fries out of the oven and turn the oven to broil. Make sure the top rack is close enough for broiling, then place skewers in the oven with the oven door cracked. The chicken will only take about 6 minutes, and need to be turned once while cooking.
And there you have it! A delicious and, relatively, nutritious meal. Minimal preservatives, hearty in even small portions, and a great meal for just about everyone in the family!


